Category Archives: Uncategorized

Amazing Salads

My friend Julie and I were talking the other day.   She was telling me of her son’s project on Israel.   Among all of her suggestions to him on how to begin researching it, she suggested he look for recipes.   Being an aware friend,  she understands the deep relationship every culture has to its food.  We as Americans,  me especially because I am a Heinz 57 – thats right, purebred mutt,  have such a blended cohesion of ethnicities to our palates, that root can sometimes be shallow.  I had pizza and spaghetti growing up.   And corned beef on rye.   I had gumbo and jambalaya.   But I mostly had meat and potatoes with some wilty lettuce salad and bread.   And Wishbone dressing bought right out of the store.   A complete mishmash of cultures.  A shallow root indeed.

We’re talking and she brings out this gorgeous cookbook called Jerusalem.   The photography is amazing, I could smell and hear the street, see the old men playing backgammon smoking their hookas in the coffeehouses.   Everything in there seemed like an “I should try this at home!” moment.   She graciously loaned me the book.   She should have gotten a time commitment.

I dove first into the salads. Since the south’s spring is brutally short leading into a brutally hot summer; this seemed appropriate.

My first go at it,  I mastered the Spiced chickpeas & fresh vegetable salad.  Super easy but not super quick unless you have knife skills. The crux of this salad are the incredible refried garbanzo beans that are coated in a perfection of a spice blend.  The original recipe calls for sugar, I eliminated that because I used a flavored vinegar I got at a local spice shop here: Red Stick Spice.   Everything else was,  well, kosher for me.

Spiced Chickpeas & Fresh Vegetable salad
1 15 oz. can of garbanzo beans, washed and drained
2 small cucumbers
2 medium tomatoes
8 oz. radishes
1 red bell pepper, seeded ribs removed
1 small red onion
2/3 oz. cilantro, coarsely chopped
1/2 oz. flat leaf parsley, coarsely chopped
8 Tablespoons olive oil
2 Tablespoons lemon juice
1 1/2 teaspoons of sherry vinegar ( I used Champagne Pear flavored)
1 clove garlic, crushed
1 teaspoon ground cardamom
1 1/2 teaspoon ground allspice
1 teaspoon ground cumin
salt and freshly ground black pepper

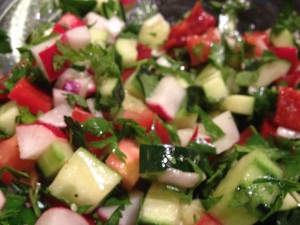
The key to this salad coming out looking right is that you chop all of the veggies to about the same size.  The recipe calls for the cucumber, tomato, radish and pepper to be about 2/3″ dice and the onion to be slightly smaller at 1/4″ dice.   I figure as long as it is small enough to fit on your fork and easily go into your mouth,  I’m happy.   Once that is all cut, mix all the veggies together along with the cilantro and parsley in a bowl.

In a jar or sealable container,  mix together 6 Tablespoons of the olive oil along with vinegar, lemon juice and garlic.   Season it with salt and pepper.

Mix the cardamom, allspice , cumin and about 1/2 tsp. of salt together in a small sealable container.   Add the rinsed garbanzo beans abd gently shake until coated.   Add 2 Tablespoons of olive oil to a skillet and let it warm up, not too hot, though.   Fry the coated garbanzo beans for about 2-3 minutes.   Shake the pan back and forth to make sure they aren’t sticking to the bottom.

When you are ready to serve the salad, pour the dressing over the vegetable/herb mixture. Toss to coat evenly.   Arrange the veggies in a semi circle on the plate then nestle the warm garbanzo beans in the curve of that crescent.

EVERYBODY came back for moreIMG_2187

IMG_2188

You can see that my salad didn’t have much of a curve.  I like more of the garbanzos than called for in the recipe.  I ended up making a second batch because my preferred ratio was half and half not 3/4  salad to 1/4 beans.
Really Slow Food

It took more than 24 hours for me to complete the making of the croissants but here is the recipe I followed, along with step by step photos.

IMG_6371

You will need to combine 2 packets of yeast and 6 Tablespoons of  warm water.  I put my Pyrex measuring cup in the microwave for 20 seconds, pinched some sugar into it then added the yeast.  Let that stand for 5-10 mins.

IMG_6372

Begin to mix the dough.  I did mine by hand.  I started by melting the 4 tblsps of butter in the microwave for about 30-40 secs.  Add the 1/4 sugar, 2 tsp of salt, 2 cups of milk, yeast mixture and 1/2 cup of flour.  I mixed this with a whisk at first because the wooden spoon I decided was best just wasn’t cutting it.

IMG_6374


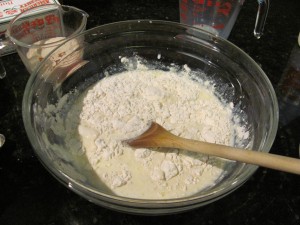
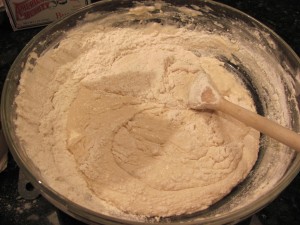
Gradually add the remaining 4 1/2 cups of flour ( for a total of 5 cups) by 1/2 cupfuls and mix until its a sticky ball.  The picture below shows what mine looks like after 3 cups of flour have been added.  Note: measure out your flour first or have a system for counting the half cupfuls.  It will be sticky but not too sticky.

IMG_6377


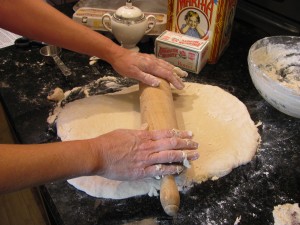
On a lightly floured surface, begin to roll out the dough into a rectangle about 1/2 inch thick.  Then place it in the ‘fridge for about 30 or 40 minutes.

IMG_6379


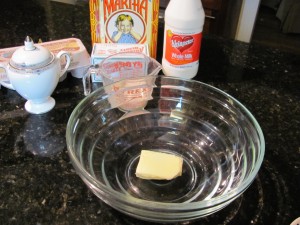
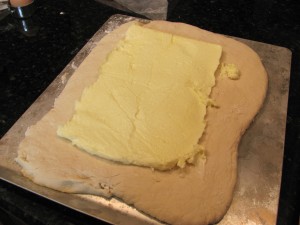
Now comes the butter package.  Take 1 pound of naked butter – strip off all the paper – and place it in a gallon freezer baggie.  Work with both your hands and the rolling pin to flatten it out.  Mine tried to force its way through the seal but pushing it around and resealing it was easy.  This butter rectangle should be slightly smaller than the dough rectangle you just made.  Once this is formed, place this back in the fridge to stiffen up a bit too.

IMG_6382


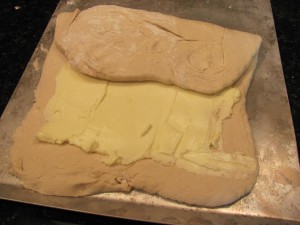
Its time to laminate the dough!  Place the butter package on the dough as in the above picture.  Now with the short side of the rectangle towards you, fold the dough over the butter as you would fold a letter going in to an envelope: into thirds.  Top third over, fold the bottom up and begin to roll it out again with the short side facing you and roll it in to a rectangle about 15″ by 10″.  This is considered a ‘turn’.  Return the dough to the fridge to chill again for between 30 and 45 mins.

IMG_6383


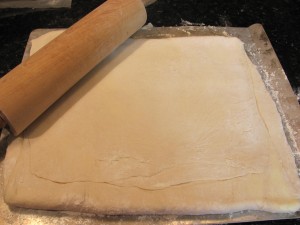
After the second ‘turn’


IMG_6384


Repeat this process for a total of four ‘turns’.   So 3 more times you will take the dough out of the fridge, roll it out, fold it over, roll it out, return to fridge.  That last time you need to refrigerate it for 4 hours or overnight.  I chilled mine overnight.  Thats why I’m saying its really slow food.

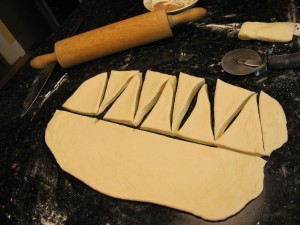
The next morning ( or later in the day), take out your dough.  Cut it in half.  Return one half to the refrigerator.  Once you roll the half you are working with into a rectangle of about 9″ by 18″ CUT IT IN HALF or you will have GIANT croissants which may not be a bad thing but you will have to bake them longer and allow them to rise longer as well.

This process goes so much quicker with a pizza cutter.

IMG_6391

Along the straight side of the croissant, cut a notch.  This makes rolling smother and tighter.  Now you have to wait even longer by allowing these guys to rise for about an hour.  I did not test how short this could be but I bet you could get away with 30 minutes.  Didn’t get a picture of them rolled before I out them in to oven.

Preheat that oven to 425 degrees and make an egg wash from 1 egg white and a tbl of water.  Brush lightly on top.

Bake for 15-18 minutes or until golden brown.  Eat!

IMG_6393


Note: If you want to freeze these babies, you will want to freeze them right after you roll them up and before baking.  Set on baking tray and place in freezer for at least 2 hours.   You can reach in and reap the rewards of your hard work for as long as those mouths camoring for them let you.  Or you can make a double batch.

Recipe:
2 packets of yeast
1/4 c of sugar
6 Tablespoons of warm water
2 teaspoons salt
4 Tablespoons butter, melted
2 cups of cold whole milk
5 cups of flour, plus more for rolling the dough
2 cups (4 sticks {1 pound}) of cold butter
1 large egg white, beaten with 2 teaspoons of water

1. Start the yeast. Dissolve the yeast and a pinch of the sugar in the 6 tablespoons of water. Let stand for about 5 minutes. It will become foamy and smell like bread.
2. Melt the butter then add the sugar, salt, milk, yeast mixture and 1/2 cup of the flour. Mix this with a wooden spoon until blended. Add the flour by 1/2 cupfuls until it is all incorporated. It will be a sticky ball.
3. Flour a surface and roll out the dough into a rectangle about 1/2″ thick. Put this onto a baking sheet and cover with plastic wrap. Put this in to the refrigerator until chilled, about 40 minutes.
4. Make the butter package by putting the pound of butter into a gallon size freezer bag and work it until it is a rectangle. It should be smaller than your dough rectangle. Don’t go for perfection here as long as it fits into the dough rectangle, it will come out fine.
5. Create the buttery layers by laminating the dough. Take the dough rectangle out of the fridge. Roll it into a 16″ by 10″ rectangle. Center the butter package on the dough, then fold it like a letter: 1/3 top down, then 1/3 bottom up. Place the short side facing you and roll this out into a 16 by 10 rectangle again. Fold over like the letter, short side facing you, roll out again. This is considered one ‘turn’
6. Put this back into the fridge to chill for between 30-45 minutes.
7. Back to the rolling surface and with the short side facing you again, roll out the dough to the rectangle, fold it, flip it so short side is facing you, roll it out again.
8. You have now completed 2 turns. Do it 2 more times and after that chill the dough for 4 hours or overnight.
9. Take the dough out of the fridge. Cut it in half. Return one half to the fridge and roll out the other. Cut the rectangle in half. The use a pizza cutter or a sharp knife and make the triangles. Cut a small vertical slit in the straight side for easier rolling. Place on a parchment lined baking sheet and cover with a towel. Allow these to rest and rise for 1-2 hours. They will not double in size like other yeast breads do.
10. While waiting for these to rise, preheat oven to 425 degrees.
11. Brush tops of croissants with the egg wash. Put the baking sheet in the middle of the oven and bake for 15-18 minutes. When done, let them cool on a wire rack. Serve warm or a t room temperature.

NOTE: To freeze, follow steps 1 through 9. Cover the baking sheets and freeze them for 2 hours. Remove the pans and place the croissants in a freezer safe bag and seal. To bake, allow the croissants to thaw OVERNIGHT in the fridge and then bake as directed.
They will keep in the freezer for 6 months.

Food Memories

There are lots of memories our bodies store. Some can be triggered by sight, some by touch, many by smell.  Food memories, for me, involve all three and I indulge myself in reliving as many as I can.  Sometimes multiple times a day.

Growing up , my mother was a lousy cook.  She often had to tell us “this is so delicious, you are going to want to eat this up!” and we would reluctantly put fork to mouth and swallow down whatever was on our plate.  So we could get to dessert which at least had sugar in it.

As I moved out and went to college, I began to cook more and more and was already an avid reader of  Mother Earth News so I knew I wanted to eat healthily and sustainably.  Finals week always involved making whole wheat bread because a lot of kneading was required.  It really helped with the tension.  I still bake on occasion.  This week is one of those occasions.

One of the things I also do with my cooking is travel with my taste buds.  This week, we are going to Paris.  I am baking chocolate croissants and presenting that recipe to you here.

Come join me as we travel down memory lane and the world as we explore Food Stories.

images